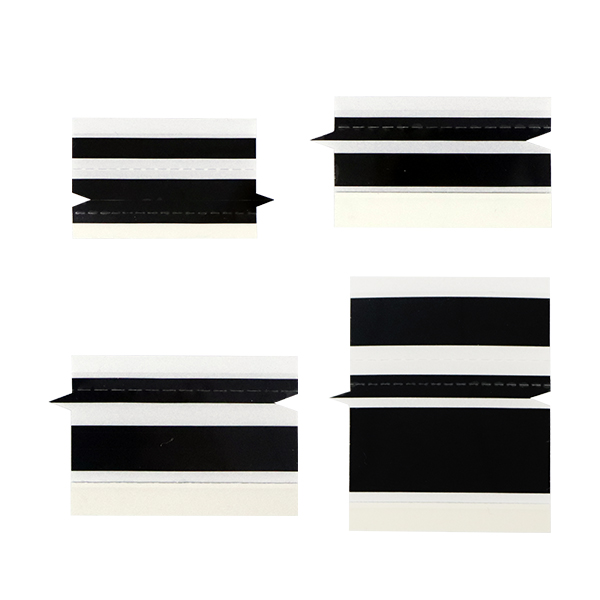
- SMT Splice Tape
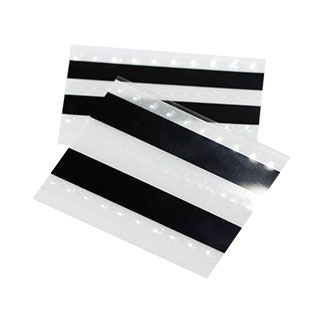
It is suitable for splicing a variety of SMT machine carrier belts
Products variations colors and images without any additional plugins. - Splicing Tape Tool
- SMT Splice Cart
- Cleaning Wipes
Panasonic splice tape: what it is, why it matters, and how to get it right
 If your SMT line runs Panasonic equipment, you already know downtime is the enemy. A single empty feeder at the wrong moment can stall a CM602 for minutes, not seconds. And on a high-mix production schedule, those minutes add up fast.Splice tape is the fix. It joins the tail of one component reel to the head of the next, so the feeder never runs dry. No stopping. No manual changeover. No operator sprinting across the floor with a replacement reel.
The catch? Not all splice tapes play nice with Panasonic feeders.
What makes Panasonic splice tape different
Panasonic’s intelligent feeder system is more sensitive than the generic tape feeders you’ll find on older machines. The feed rollers expect a precise thickness, and the tape path has tighter tolerances on edge alignment. If the splice is even slightly off, the feeder detects it as a misload and stops. That defeats the whole point.
A proper Panasonic-compatible splice tape should cover a few bases:
Width range matters more than you’d think. Panasonic feeders handle everything from 8mm paper carrier tape for 0402 chip components up to 88mm embossed tape for larger connectors. You need splice tape that matches each width exactly. A 12mm splice on 8mm tape leaves adhesive overhang that gums up the track. A 24mm splice on 32mm tape leaves unsupported edges that catch on guide rails.
Double-sided is the standard for Panasonic. Single-sided splice tape exists, but on Panasonic feeders (especially the NPM and CM series), the bottom adhesive layer keeps the trailing tape flat against the feeder bed. If the underside lifts, the sprocket holes lose engagement and the feeder skips.
ESD isn’t optional. These feeders run in production environments where static discharge kills components. Yellow ESD-grade splice tape with anti-static coating is the minimum. Black PET-based ESD tape adds durability for longer splices but costs more. Both work. Neither is optional.
Which Panasonic models this applies to
Here’s a quick reference. These are the machines where Panasonic splice tape gets used most:
| Machine Series | Feeder Type | Tape Width Range | Common Splice Widths |
| NPM-D3 / NPM-W2 | Auto-loading intelligent feeder | 8mm – 88mm | 8, 12, 16, 24mm |
| CM602 / CM402 | High-speed modular feeder | 8mm – 56mm | 8, 12, 16, 24, 32mm |
| NPM-TT / NPM-GH | TT-series tape feeder | 8mm – 44mm | 8, 12, 16mm |
| MSF / MSL Series | Standard tape feeder | 8mm – 32mm | 8, 12, 16mm |
The NPM-D3 and CM602 lines account for the bulk of splice tape demand. If you’re buying for one of those, stick with 8-24mm double-sided ESD tape and you’ll cover most situations.
How to splice properly on a Panasonic feeder
Splicing itself isn’t complicated, but Panasonic feeders are picky about alignment. Here’s the workflow that actually works:
- 1. Stop the feeder before splicing. Don’t try to splice while it’s loading. You’ll misalign the sprocket holes and the feeder will reject the tape on the next advance.
- 2. Use a splicing jig. The built-in track on a Panasonic splicing tool holds both tape ends flush before you lay down the splice tape. Without a jig, you’re eyeballing it, and eyeballing it eventually leads to a jam.
- 3. Align the sprocket holes first, then the edges. The sprocket holes drive engagement. If those are off by even half a pitch, the splice won’t feed. Edge alignment comes second.
- 4. Overlap by exactly one sprocket pitch. Too little overlap and the splice separates under tension. Too much and you create a stiff section that the feeder struggles to advance.
- 5. Press firmly across the entire splice. Cold spots in the adhesive bond cause partial lifts during feeding. Run a roller or the flat edge of the jig over the splice. No shortcuts.
If the feeder still rejects the splice after all that, check the tape thickness first. Some third-party splice tapes are a hair too thick for Panasonic’s feeder sensor. That’s a supplier problem, not a technique problem.
Splicing tools: worth the money or not?
If you splice more than a few times a day, get the tool. The manual approach (scissors and a steady hand) works in a pinch, but your operators will hate you. A proper Panasonic splicing tool runs about $30-50 per unit, and the time savings pay for it inside a week.
The better tools include a built-in alignment track, a precision cutter, and a pressure roller. Some also have a positioner for different tape widths, which eliminates the “is this 8mm or 12mm” guessing game operators play at 3 AM during third shift.
A basic splice kit should have: the tool itself, a stock of splice tape in your three most common widths, a spare cutter blade, and a cleaning swab for the feeder track. That’s it. You don’t need the $200 deluxe kit unless you’re running a dozen Panasonic lines simultaneously.
Where things go wrong (and how to fix them)
After talking to a few production engineers who run Panasonic lines daily, here’s what actually screws up:
Feeder jams after a splice. This is almost always an alignment issue, not a tape quality issue. The sprocket holes on the new reel don’t match the pitch of the old reel. Check that both reels use the same component packaging spec (EIA-481 format). If one is paper and the other is embossed plastic, the splice will jam no matter how carefully you apply the tape.
The splice tape peels off mid-feed. Adhesive failure. Usually happens with off-brand tape that’s been sitting in a warehouse for two years. Splice tape has a shelf life. If it’s been exposed to heat or humidity, the adhesive degrades. Buy from a supplier who can tell you the manufacture date.
The feeder sensor rejects the splice as a misload. This is the most common Panasonic-specific complaint. The feeder’s optical sensor is calibrated for factory-spec tape thickness. If your splice tape adds more than ~0.15mm of total height, the sensor trips. The fix is thinner splice tape — look for products advertised as “low profile” or specifically certified for Panasonic intelligent feeders.
What to look for in a supplier
Panasonic splice tape is a commodity, but the quality spread is wider than you’d expect. Here’s what separates a decent supplier from a bad one:
- • Can they tell you the exact PET film thickness and adhesive type? If not, walk.
- • Do they offer a printed arrow or alignment mark on the splice tape? This sounds trivial, but operators loading tape at speed rely on it.
- • Is the tape cut cleanly on the edges? Burred edges catch on Panasonic guide rails.
- • Do they package in sealed ESD bags with silica gel? Humidity kills adhesive performance over time.
One more thing: ask for samples before committing to a bulk order. Any supplier worth dealing with will send you a roll to test on your actual Panasonic line. If they won’t, there’s a reason.
Bottom line
Panasonic splice tape isn’t exotic. It’s a straightforward consumable that saves real money by cutting feeder downtime. The difference between the right tape and the wrong tape shows up in your OEE numbers within a week.
Buy the right width. Stick with double-sided ESD tape. Use a splicing jig. Align the sprocket holes religiously. And if your current supplier’s tape keeps tripping the feeder sensor, switch to a lower-profile product — your operators will thank you.
Need Panasonic-compatible splice tape? We manufacture the full range — 8mm through 88mm, double-sided, ESD-grade, with alignment arrows. [Request samples here] or [contact us] for pricing.